How to Deploy Django and React Applications on Ubuntu 20.04 with Docker
Traducciones al EspañolEstamos traduciendo nuestros guías y tutoriales al Español. Es posible que usted esté viendo una traducción generada automáticamente. Estamos trabajando con traductores profesionales para verificar las traducciones de nuestro sitio web. Este proyecto es un trabajo en curso.
Before You Begin
If you have not already done so, create a Linode account and Compute Instance. See our Getting Started with Linode and Creating a Compute Instance guides.
Follow our Setting Up and Securing a Compute Instance guide to update your system. You may also wish to set the timezone, configure your hostname, create a limited user account, and harden SSH access.
NoteThe steps in this guide require root privileges. Be sure to run the steps below asrootor with thesudoprefix. For more information on privileges, see our Users and Groups guide.
How to Deploy Django and React Applications on Ubuntu 20.04 with Docker
Are you a developer that wants to learn how to deploy their application to a Linux server?
If yes, you have come to the right place, you will learn the process which you can use to deploy your application so that it can be accessed by everyone.
This article goes through how to build a Django and React application and deploy it on an Ubuntu server. The article show all the complexities that come with deploying an application like that and how to solve all the problems they encounter.
You go from building a contact list application to dockerizing the application to ease the deployment process. Then, set the firewall for security, and configure NGINX to display our application through the remote IP address. Then finally run the application.
This guide assumes you are familiar with the following concepts and skills:
- Basic understanding of …
Prerequisites
- Django installed locally
- NPM installed
Build the Backend
Before you can deploy anything, we need to first have an application to deploy. This section goes through how to build a simple contact app API with Django. Start by building the Django application and then you attach the React application later.
We will build this project locally before we push it to the server. Build the Django API by following the steps below.
Create the project directory (
django-react/). The directory you just created will contain everything related to your project. In the project directory, create a new directory for your Django API (api/).In your command line/terminal, navigate to the API directory and run the following command to start a Django project.
django-admin startproject contact_list .Create a Django app by running the following command. python manage.py startapp app
Now add the app you just created to your settings.py file, like you see in the code below.
- File: django-react/api/contact_list/settings.py
1
2
3
4
5
INSTALLED_APPS = [ ..., 'rest_framework', #needed to create the API 'corsheaders', # used to allow react server to access the Django app "app"]
- Open
api/contact-list/urls.pyand add a route to the app you have created by updating the urls list.- File: django-react/api/contact-list/urls.py
1
2
3
4
5
from django.urls import path, include urlpatterns = [ path('admin/', admin.site.urls), path('app/', include("app.urls"))] #route for new app
- Now, open
api/app/models.pyand paste the code below. The following code contains the database fields that holds the contact data.- File: django-react/api/app/models.py
1
2
3
4
5
6
7
from django.db import models class Contact(models.Model): name = models.CharField(max_length=200) phone_number = models.CharField(max_length=200) def __str__(self): return self.name
- Next, create the
viewsfor saving and listing out contacts in the database. You can do this by pasting the following code inapi/app/views.py.- File: django-react/api/app/views.py
 1
 2
 3
 4
 5
 6
 7
 8
 9
10
11
12
13
14
15
16
17
18
19
20
from rest_framework import generics from rest_framework import status from rest_framework.decorators import api_view from .serializers import ContactSerializer from rest_framework.response import Response from .models import Contact @api_view(['POST']) def create_contact(request): # create coontact contact = ContactSerializer(data=request.data) if contact.is_valid(): contact.save() return Response(contact.data) else: return Response(status=status.HTTP_404_NOT_FOUND) class ContactList(generics.ListCreateAPIView): # list out contacts queryset = Contact.objects.all() serializer_class = ContactSerializer
- Create a new file,
api/app/serializers.py, and paste the following code. The code below converts the data obtained from the database into a format that is understandable by the frontend.
- File: django-react/api/app/serializers.py
1
2
3
4
5
6
7
from rest_framework import serializers from .models import Contact class ContactSerializer(serializers.ModelSerializer): class Meta: model = Contact fields = ('name', 'phone_number',"id") # fields in the models
Next, create a new file
api/app/urls.pyand paste the code below to set the routing for theviews.- File: django-react/api/app/urls.py
1
2
3
4
5
6
from . import views from django.urls import path urlpatterns = [ path('create/', views.create_contact, name='create-items'), path('list/', views.ContactList.as_view(), name='view-contacts'),]
Finally, for the backend side update the
settings.pyfile to accept React and Docker.- File: django-react/api/contact_list/settings.py
1
2
3
4
ALLOWED_HOSTS = ['*'] ... CORS_ORIGIN_WHITELIST = [ 'http://localhost:3000']
Create the Frontend
Now build the frontend part. To start, go to the root of your project (
django-react/) run the following command to initializecreate-react-appin your project.$ npx create-react-app frontend $ cd frontendCreate a new file
frontend/src/components/form.js, and paste the code below. The following code handles the form that saves a contact.- File: frontend/src/components/form.js
 1
 2
 3
 4
 5
 6
 7
 8
 9
10
11
12
13
14
15
16
17
18
19
20
21
22
23
24
25
26
27
28
29
30
31
32
33
34
35
36
37
38
39
40
41
42
43
import React, { useState } from "react"; import axios from "axios"; export const Form = () => { const [name1, setName1] = useState(""); const [phone_number, setPhone_number] = useState(""); let formField = new FormData(); formField.append("name", name1); formField.append("phone_number", phone_number); const handleFormSubmit = async () => { await axios({ method: "post", url: "/app/create/", data: formField, }) }; return ( <> <form onSubmit={handleFormSubmit}> <input className="form-class" type="text" placeholder="Enter Name" required value={name1} onChange={(e) => setName1(e.target.value)} ></input> <input className="form-class" type="text" placeholder="Enter phone number" required value={phone_number} onChange={(e) => setPhone_number(e.target.value)} ></input> <input type="submit"></input> </form> <br /> </> ); };
Create a new file
frontend/src/components/card.js, and paste the code below. The following code handles the logic for listing the contacts.- File: frontend/src/components/card.js
 1
 2
 3
 4
 5
 6
 7
 8
 9
10
11
12
13
14
import React from "react"; export const Card = ({ listOfContacts }) => { return ( <> {listOfContacts.map(contact => { return ( <ul key={contact.id}> <li className="contact-list">{contact.name}: {contact.phone_number}</li> </ul> ); })} </> ); };
Create a new file
frontend/src/components/home.js, and paste the code below. The following code handles the home page where the contact list and form are displayed.- File: frontend/src/components/home.js
 1
 2
 3
 4
 5
 6
 7
 8
 9
10
11
12
13
14
15
16
17
18
19
20
21
22
23
24
25
26
27
28
29
30
31
32
33
34
35
36
37
38
39
40
41
42
43
44
45
46
47
48
49
50
51
52
53
import React, { useState, useEffect } from "react"; import { Card } from "./card"; import { Form } from "./form"; export const ContactPage = () => { const [contact, setContact] = useState([]); const [name1, setName1] = useState(null) const [phone_number, setPhone_number] = useState(null) let formField = new FormData() formField.append('name',name1) formField.append('phone_number',phone_number) useEffect(() => { fetch("/app/list") .then((response) => { if (response.ok) { return response.json(); } }) .then((data) => setContact(data)); }, []); const handleFormSubmit = () => { fetch("/app/create", { method: "POST", body:formField, headers: { "Content-type": "application/json; charset=UTF-8", }, }) .then((response) => response.json()) .then((message) => { getUpdate(); }); }; const getUpdate = () => { fetch("/app/list") .then((response) => { if (response.ok) { return response.json(); } }) .then((data) => setContact(data)); }; return ( <> <Form/> <Card listOfContacts={contact} /> </> ); };
Install additional dependencies for routing.
$ npm i react-router react-router-domUpdate the
frontend/src/App.jsto display our application by pastind the code below in the file.
- File: frontend/src/App.js
 1
 2
 3
 4
 5
 6
 7
 8
 9
10
11
12
13
14
15
16
17
18
19
20
21
22
import React from "react"; import "./App.css"; import { ContactPage } from "./components/home"; import { BrowserRouter as Router, Route } from "react-router-dom"; function App() { return ( <div className="App"> <header className="App-header"> <Router> <Route exact path="/"> <ContactPage /> </Route> </Router> </header> </div> ); } export default App;
- Update the
frontend/src/App.cssto improve the styling of the application by paste the code below in the file.
- File: frontend/src/App.css
1 2 3 4 5 6 7 8 9 10 11 12 13 14 15 16 17 18 19 20 21 22 23 24*{ text-decoration: none; } body { font-size: 1.6rem; background-color: #efefef; color: #324047 } .App-header{ padding-left: 500px; } .form-class{ margin-top: 100px; } .contact-list{ position: relative; list-style-type: square; padding-left: 1rem; margin-bottom: 0.5rem; }
Set up Docker for Application
In this section, you make your current application run on Docker and Docker Compose. This makes it easy for you when you want to deploy the application because the whole application runs as a single unit.
- On your text editor, navigate to
api/, create a new file with the nameDockerfilethen paste the following code. This tells Docker how your Django application should be built.
- File: api/Dockerfile
 1
 2
 3
 4
 5
 6
 7
 8
 9
10
11
12
13
14
15
FROM python:3.8.2 ENV PYTHONUNBUFFERED 1 WORKDIR /api # copy requirements file to Docker image COPY ./requirements.txt . # Install the dependencies requirements.txt file in Docker image RUN pip install -r requirements.txt # Copies api from local machine to Docker image COPY . . EXPOSE 8000
Now, create the
requirements.txtfile at the root of your project and input the text below. Below is a list of dependencies needed to run your project.django==3.1 django-cors-headers==3.11.0 djangorestframework==3.11.0On your text editor, navigate to
frontend/, create a new file with the nameDockerfilethen paste the following code.- File: api/Dockerfile
 1
 2
 3
 4
 5
 6
 7
 8
 9
10
11
12
13
FROM node:14.17.3 WORKDIR /frontend COPY ./package.json /frontend RUN npm install COPY . . EXPOSE 3000 CMD ["npm", "start"]
Create a new file with the name
docker-compose.ymland paste the following code. The YAML code is going to run the frontend and backend simultaneously.
- File: docker-compose.yml
1 2 3 4 5 6 7 8 9 10 11 12 13 14 15 16 17 18 19 20services: api: build: ./api ports: - "8000:8000" volumes: - ./api:/api command: bash -c "python manage.py makemigrations && python manage.py migrate && python manage.py runserver 0.0.0.0:8000" web: build: ./frontend ports: - "3000:3000" volumes: - ./frontend:/frontend - /frontend/node_modules depends_on: - api
Set up the Application to Run on the Server
Set up Firewall for Network Security
This section handles firewall which is essential for regulating, and blocking unwanted network traffic into the server.
Install UFW (Uncomplicated Firewall), which is used for the Firewall configuration.
$ sudo apt install ufwAllow all outgoing ports by running the command below.
$ sudo ufw default allow outgoingNow block anyone trying to reach your server from the outside world by running the command below.
$ sudo ufw default deny incomingNow allow SSH so that you continue to access our server with SSH.
$ sudo ufw allow sshFinally, enable UFW on your server.
$ sudo ufw enable
Set up NGINX as Reverse Proxy
Install NGINX on Server.
$ sudo apt install nginxRemove NGINX default file so that we can write our own.
$ sudo rm /etc/nginx/sites-enabled/defaultCreate NGINX configuration. Run
nano /etc/nginx/sites-enabled/django-reactto create a new NGINX configuration file and open it withnano. Paste the code you have below in the opened file. The code below passeshttp://localhost:3000to the IP address of your remote server.
- File: /etc/nginx/sites-enabled/django-react
1
2
3
4
5
6
7
8
9
server{ listen 80; server_name 78.141.227.139; location / { proxy_pass http://localhost:3000; include /etc/nginx/proxy_params; } }
Allow
http/tcptraffic on our firewall so that your browser can access your app.$ sudo ufw allow http/tcpRestart NGINX to implement the settings you created.
$ sudo systemctl restart nginx
Run Application on server
On your Ubuntu server, create a folder for your project by running
mkdir project.Now you need to first copy the application into the remote server. On your local machine, run the command below. Don’t forget to change
78.141.227.139in the command below to the IP address of your remote server.$ scp -r path/to/ptroject root@78.141.227.139:/path/to/remote/project/folderOn the remote server,
cdinto the project file and run the command below to build the Docker image.$ sudo docker-compose buildRun the application.
$ sudo docker-compose up
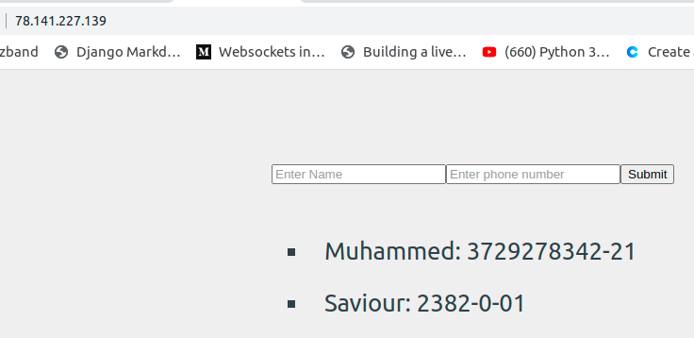
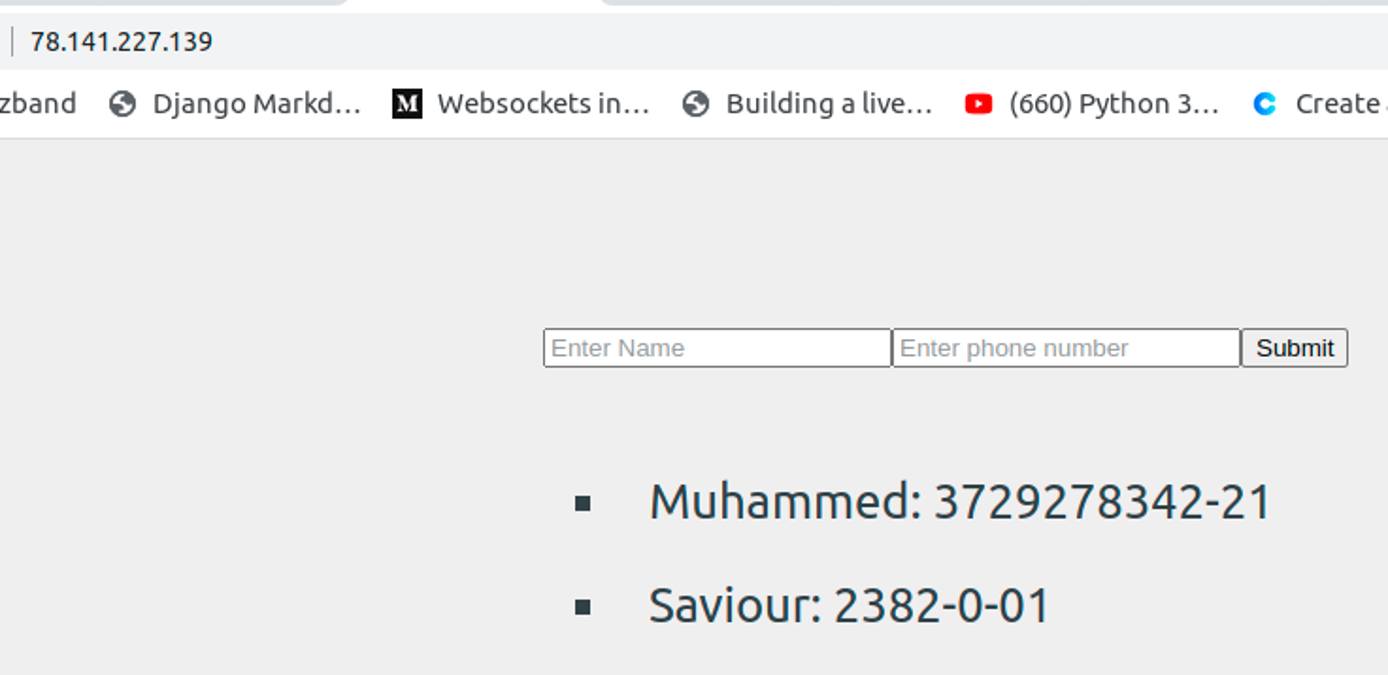
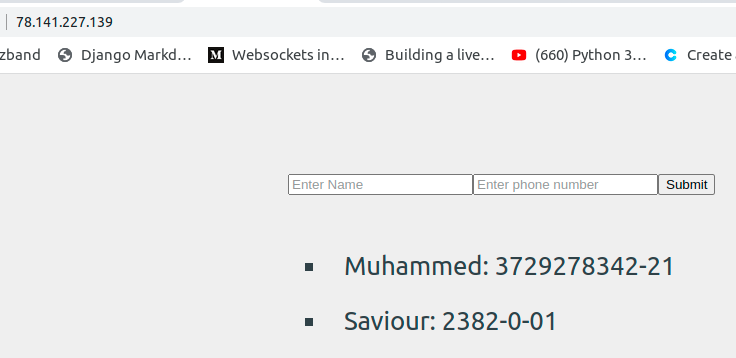
Now open your remote IP address on your browser and you should see your application come up.


Conclusion
In this article, you went through how to build a Django and React application and deploy it on an Ubuntu server. I showed you how to handle some of the complexities that come with deploying an application like that and how to solve all the problems they encounter.
You went from building a contact application to dockerizing the application to ease the deployment process. Then, we set the firewall for security, and configured NGINX to display our application through the remote IP address.
You can take the knowledge you’ve gotten in this tutorial a step further by deploying an application with static files and see what needs to be changed to make that work.
More Information
You may wish to consult the following resources for additional information on this topic. While these are provided in the hope that they will be useful, please note that we cannot vouch for the accuracy or timeliness of externally hosted materials.
This page was originally published on
